im trying to boost my internet connection, I was
surprised to find out that using a free public DNS server from other company was far better than using my local ISP DNS.
I was getting very frustrated with the constant Webpage cannot load errors followed by the website loading 5 seconds later. I kept seeing the DNS lookup failed message, so I figured let me try another DNS provider and that made an absolute world of difference.

Google being Google, they have massive scale, load-balancing, redundancy and DNS servers distributed all over the world. They also support the latest technologies and security mechanisms like IPv6 DNS servers and DNSSEC. Their DNS servers are also well protected against DoS attacks and cache poisoning attacks.
It’s worth noting that Google Public DNS does not perform any blocking or filtering on the DNS requests, as some of the other services do. They state that only under extraordinary circumstances would they block anything. For me, this is a good option because I use other tools to filter out malware sites, etc and don’t necessarily want my DNS service to be involved.
The main benefit for using Google is their global data center and the fact that they have DNS servers located around the world. Some other services only have DNS servers located in one part of the world, so the performance will suffer considerably.
The main downside to using Google is that they are all about tracking and logging everything anyone does on the Internet and this is no exception. If you are leery of Google having too much information, I would suggest using a different DNS server.

Level 3 is the company that provides a lot of ISPs their connection to the Internet backbone, so they are huge, reliable and secure. There is no filtering with Level 3, just like Google DNS, so it’s mostly used for performance and reliability.
Depending on your location in the world, any of the public DNS servers I mention here could be the fastest, so that’s why it’s necessary to read the link above on finding the fastest DNS server for your connection.

OpenDNS has been around for a very long time and they are a reputable company. OpenDNS provides several services including Enhanced DNS and Parental Controls, both of which are free.
OpenDNS is also the first public DNS that I have mentioned that does automatic blocking and filtering against phishing attacks and identity theft. This is a great option if you have kids and want to prevent them from landing on malware-infested sites or if you have older family members who sometimes click on spam links in emails.
They also have a VIP service for $20 a month that gives you a bunch Internet usage statistics for all the devices on your network.

Norton ConnectSafe is the public DNS service provided by Norton. Like OpenDNS, Norton also has automatic filtering and blocking based on their database of sites. Using the free DNS speed tools I mentioned, it’s also one of the fastest public DNS servers.
Norton DNS has a couple of different DNS servers, depending on the type of protection you want. They have three options:
A – Protection against malware, phishing sties and scam sites
B – A + Pornography
C – A +Pornography + Other
Other will basically block sites related to mature content, gambling, hate, suicide, tobacco, drugs, alcohol, etc. Obviously, that could block a lot of sites, so us that option as you see fit.

Lastly, another one I like to use is OpenNIC. They have servers all of the world run by their own members and exist to provide a democratic, non-national network that protects your privacy. The link above will show you a list of all of their Tier 2 DNS servers around the world, but you can go to the homepage and it will tell you the closest servers to your IP automatically at the top right.
When looking at the list of servers, you can choose one that fits your privacy needs. A lot of them keep no logs, have logs completely disabled or keep anonymous logs.
So those are my top recommendations for public DNS servers that are reliable, fast, and provide extra security and filtering for those that need it. Even though most people use their ISP for DNS, it’s really much better to use a third-party. If you have any questions, let us know in the comments. Enjoy!
Gilmon D. Bernal
I was getting very frustrated with the constant Webpage cannot load errors followed by the website loading 5 seconds later. I kept seeing the DNS lookup failed message, so I figured let me try another DNS provider and that made an absolute world of difference.
1. Google Public DNS
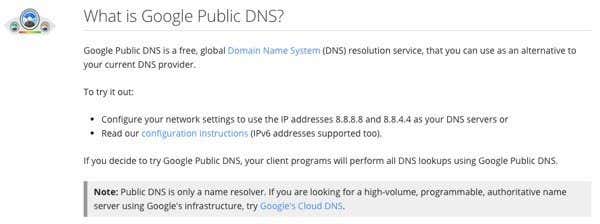
Google being Google, they have massive scale, load-balancing, redundancy and DNS servers distributed all over the world. They also support the latest technologies and security mechanisms like IPv6 DNS servers and DNSSEC. Their DNS servers are also well protected against DoS attacks and cache poisoning attacks.
It’s worth noting that Google Public DNS does not perform any blocking or filtering on the DNS requests, as some of the other services do. They state that only under extraordinary circumstances would they block anything. For me, this is a good option because I use other tools to filter out malware sites, etc and don’t necessarily want my DNS service to be involved.
The main benefit for using Google is their global data center and the fact that they have DNS servers located around the world. Some other services only have DNS servers located in one part of the world, so the performance will suffer considerably.
The main downside to using Google is that they are all about tracking and logging everything anyone does on the Internet and this is no exception. If you are leery of Google having too much information, I would suggest using a different DNS server.
Google Public DNS IPv4 Addresses:
- 8.8.8.8
- 8.8.4.4
Google Public DNS IPv6 Addresses:
- 2001:4860:4860::8888
- 2001:4860:4860::8844
2. Level 3 DNS
Level 3 is the company that provides a lot of ISPs their connection to the Internet backbone, so they are huge, reliable and secure. There is no filtering with Level 3, just like Google DNS, so it’s mostly used for performance and reliability.
Depending on your location in the world, any of the public DNS servers I mention here could be the fastest, so that’s why it’s necessary to read the link above on finding the fastest DNS server for your connection.
Level 3 Public DNS Server Addresses:
- 209.244.0.3
- 209.244.0.4
- 4.2.2.1
- 4.2.2.2
- 4.2.2.3
- 4.2.2.4
3. OpenDNS
OpenDNS has been around for a very long time and they are a reputable company. OpenDNS provides several services including Enhanced DNS and Parental Controls, both of which are free.
OpenDNS is also the first public DNS that I have mentioned that does automatic blocking and filtering against phishing attacks and identity theft. This is a great option if you have kids and want to prevent them from landing on malware-infested sites or if you have older family members who sometimes click on spam links in emails.
They also have a VIP service for $20 a month that gives you a bunch Internet usage statistics for all the devices on your network.
OpenDNS IP Addresses:
- 208.67.222.222
- 208.67.220.220
4. Norton ConnectSafe DNS
Norton ConnectSafe is the public DNS service provided by Norton. Like OpenDNS, Norton also has automatic filtering and blocking based on their database of sites. Using the free DNS speed tools I mentioned, it’s also one of the fastest public DNS servers.
Norton DNS has a couple of different DNS servers, depending on the type of protection you want. They have three options:
A – Protection against malware, phishing sties and scam sites
B – A + Pornography
C – A +Pornography + Other
Other will basically block sites related to mature content, gambling, hate, suicide, tobacco, drugs, alcohol, etc. Obviously, that could block a lot of sites, so us that option as you see fit.
Norton DNS IP Addresses:
Option A:- 199.85.126.10
- 199.85.127.10
- 199.85.126.20
- 199.85.127.20
- 199.85.126.30
- 199.85.127.30
5. OpenNIC DNS
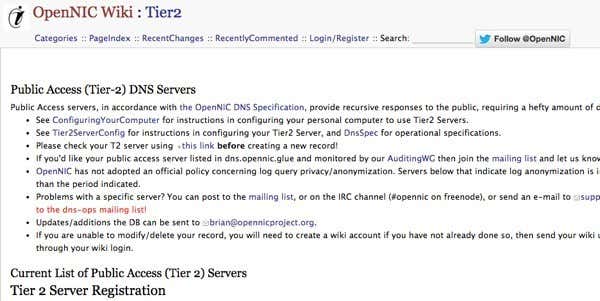
Lastly, another one I like to use is OpenNIC. They have servers all of the world run by their own members and exist to provide a democratic, non-national network that protects your privacy. The link above will show you a list of all of their Tier 2 DNS servers around the world, but you can go to the homepage and it will tell you the closest servers to your IP automatically at the top right.
When looking at the list of servers, you can choose one that fits your privacy needs. A lot of them keep no logs, have logs completely disabled or keep anonymous logs.
So those are my top recommendations for public DNS servers that are reliable, fast, and provide extra security and filtering for those that need it. Even though most people use their ISP for DNS, it’s really much better to use a third-party. If you have any questions, let us know in the comments. Enjoy!
Gilmon D. Bernal


